Most of us that have a Famicom Disk System has probably come across some disks that just won’t start and just gives you an error message when you try to start them. Don’t worry – they may still be useful!
First of all, you can try and clean the black magnetic disk with Isopropyl alcohol on a q-tip very gently. Note where the little hole on the center of the disk spindle is located, if it was located at 12 o’clock when you started, spin and clean it until it is back in that position – so you know when you’ve cleaned the whole disk.
Note that the reader on the FDS is located at the bottom, so if you have trouble reading the A-side of a disk, it is actually the part of the black disk visible from the B-side that is being read and need cleaning.
Also note that cleaning only works if the read problems was because of dirt on the disk – if the disk has been in contact with a magnet or something like that, the information is gone from the disk and it must be rewritten.
There are several ways to rewrite disks – Nintendo had their own Disk Writer kiosks, but those cost a small fortune these days, so I’m going with the cheap way.
You’ll need three things:
1. A normal RAM-cart.
2. A Famicom Disk System drive without copy protection. (early model or modded newer model)
3. An FDS-Stick. (Open source project that can be bought ready made on AliExpress for around €20 – if you want to use a Twin Famicom instead of a regular FDS, you also need to get a special adapter cable for the FDS-Stick)
Step 1: Checking / modding your FDS drive
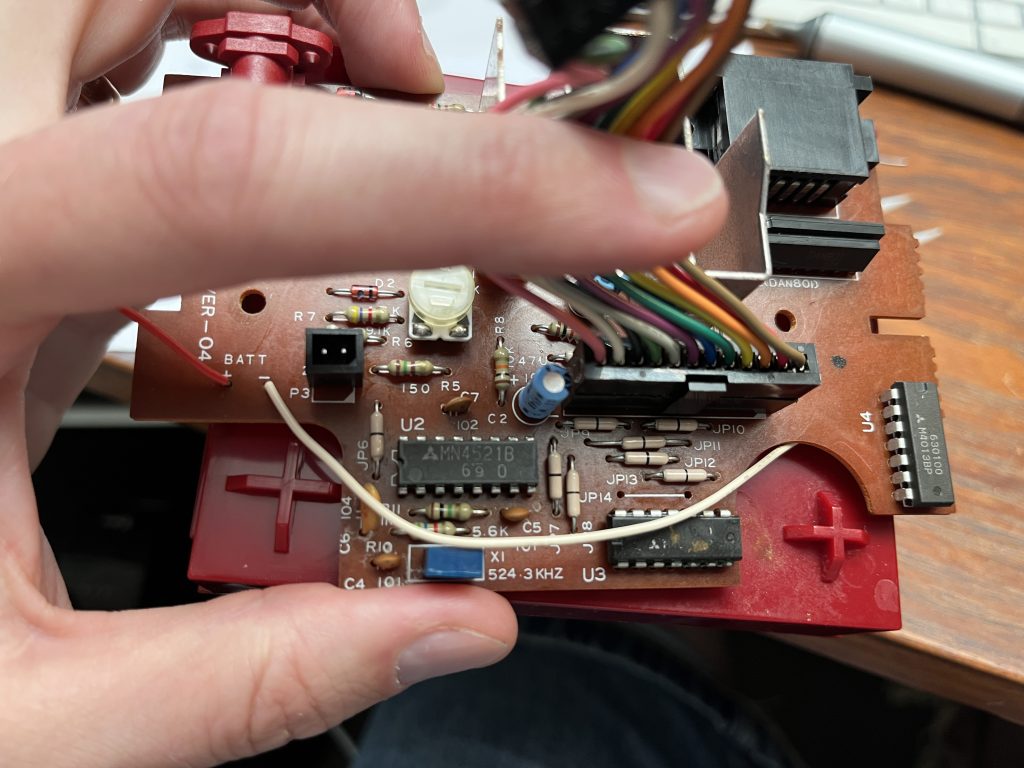
Depending on how old your FDS is, there are either 0, 1 or 2 copy protections in place. I opened up my FDS and followed this great guide on how to identify what version I had:
In my case I was quite lucky and had the 4th revison of the Power board that only needed a bridge between two pins and the easy removal of a component.
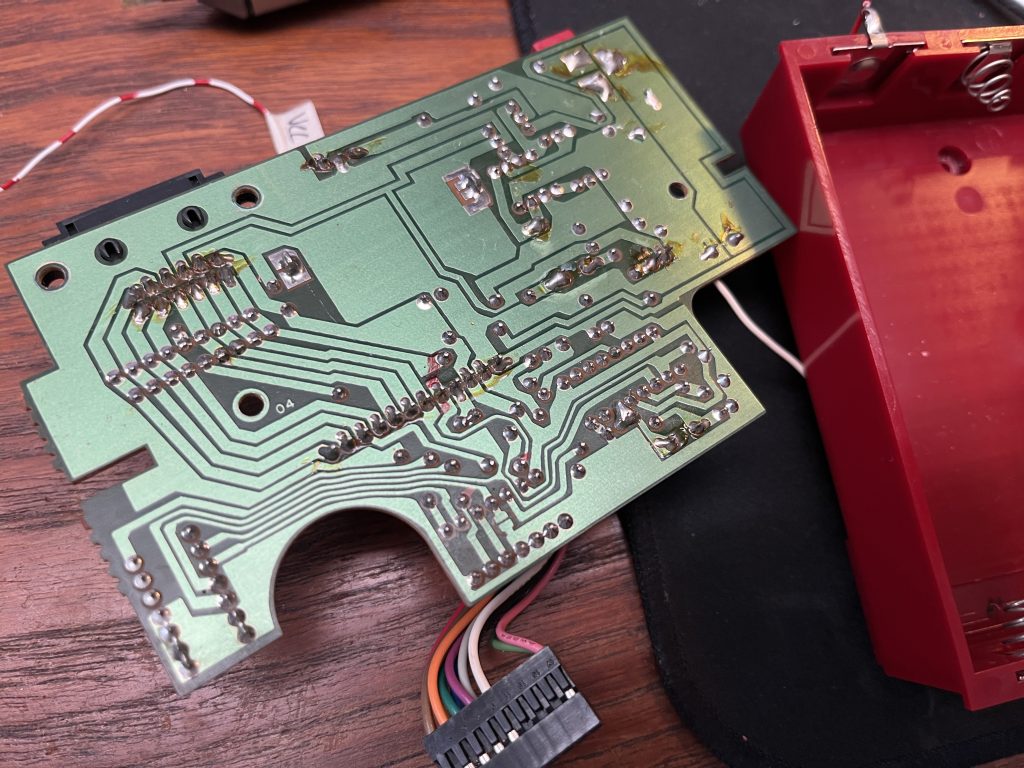
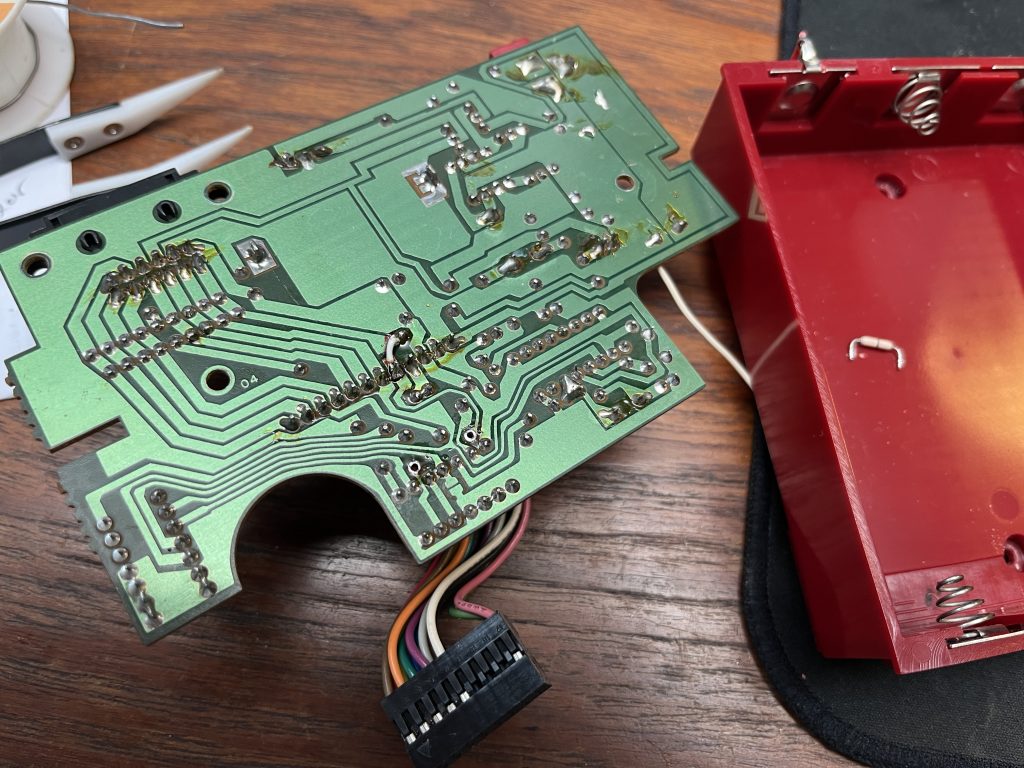
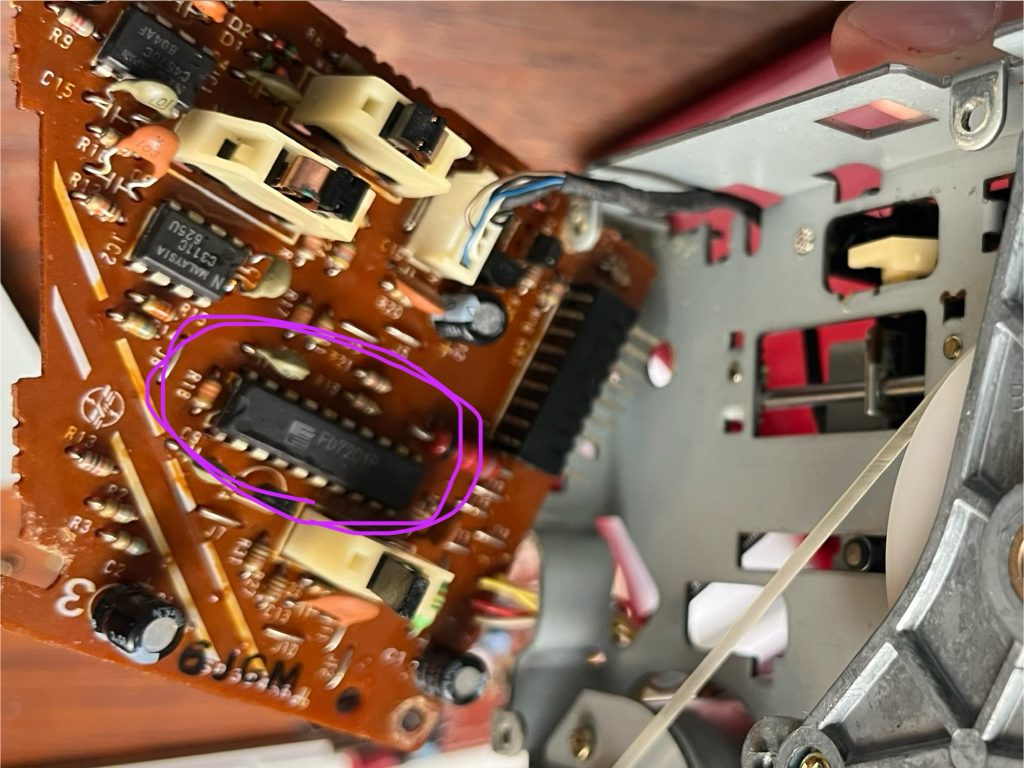
After you’ve made sure the Power board doesn’t have any copy protection, you also need to check if there is a copy protection present on the Disk PCB. You can just unscrew it and lift it gently to check one of the big chips on it. If it says 7201, it’s without protection and you can just put your FDS back together. But if the chip says 3206 you have a copy protected drive that need a replacement-chip. Check out this page on info on how to flash the chip yourself or order it from a store: https://tinkerdifferent.com/resources/famicom-write-protection-bypass-for-fds-3206-disk-drives.80/
Step 2: Copy with FDS-Stick
FDS-Stick is an open source project, so you can build one yourself if you want to. All info about is available here: https://github.com/ClusterM/fdskey
I was lazy and bought mine ready made from here: https://www.aliexpress.com/item/1005005883846815.html
Please note that the extra cable you can buy is only necessary for Twin Famicom.
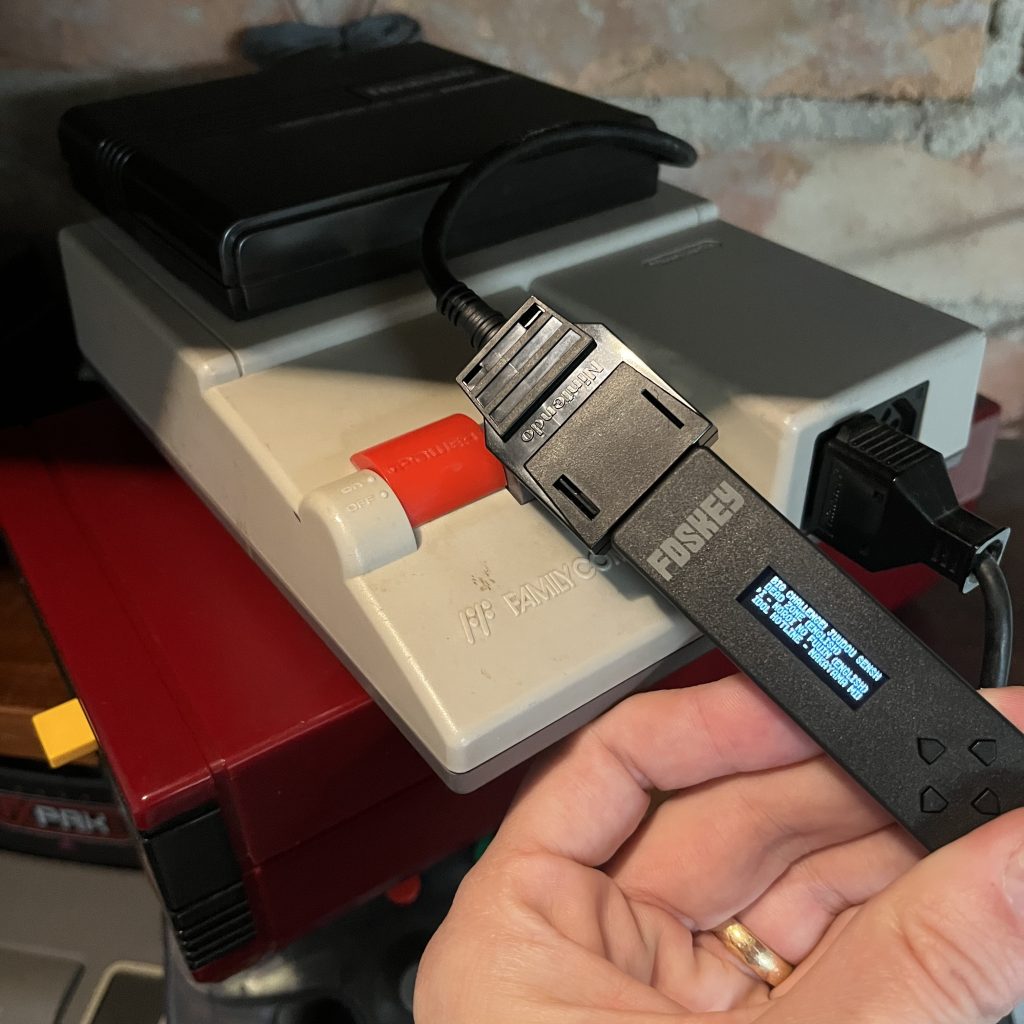
A quick note on how the FDS-Stick works. You plug it to your RAM-cart and turn on your Famicom. The Stick automatically powers up and presents you with a file menu of the SD-card inserted. Arrows up/down scrolls the files, right goes in to directory / selects file and left goes up one directory / unmounts a disk. If the .fds file has two disk sides you have to press right one time to select the file and then one time more to mount A or B side. It’s really easy and intuitive when you use it!
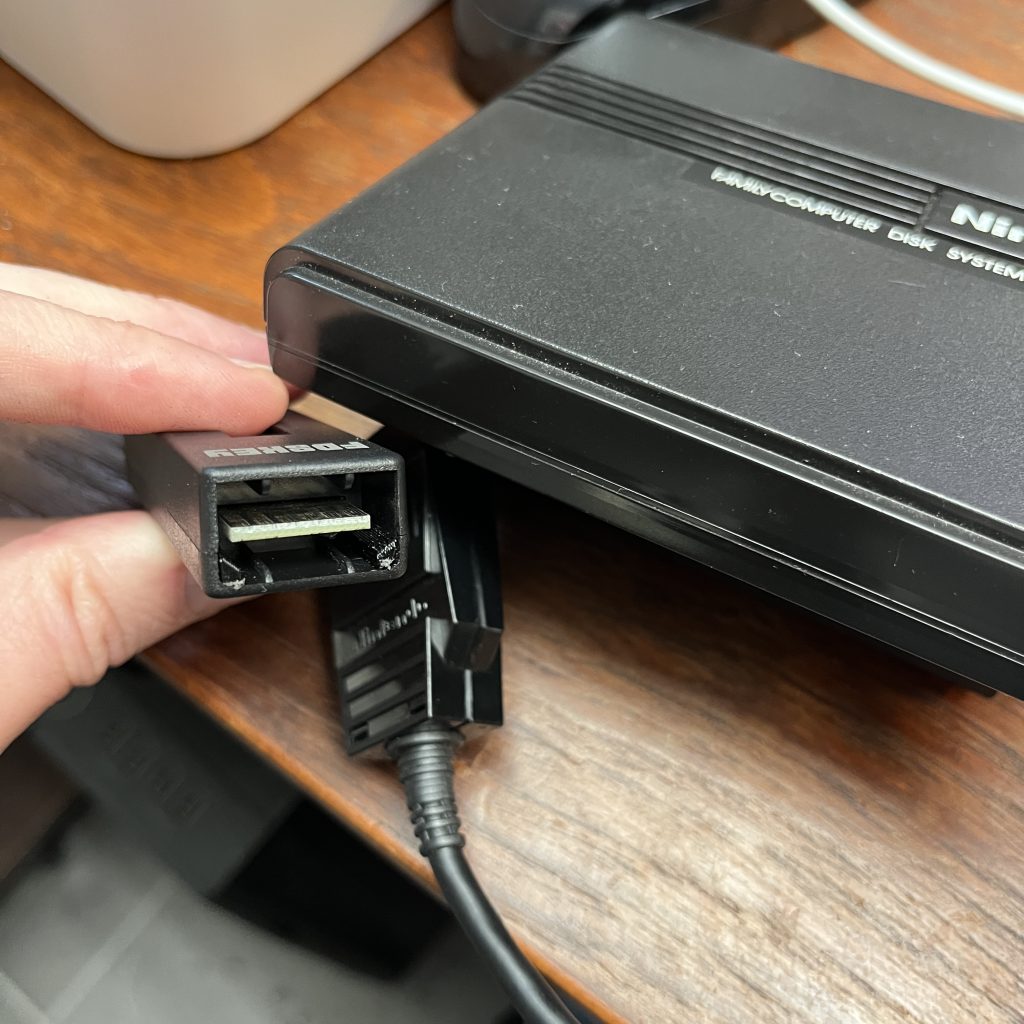
By the way, the FDS-Stick from Ali had a little flaw: you can actually insert the RAM-cart-cable upside down into it, but it should be inserted with the tilted sides down, when you look at the screen. I 3D-printed and glued some small distances in, so I can’t accidentally plug it in the wrong way.
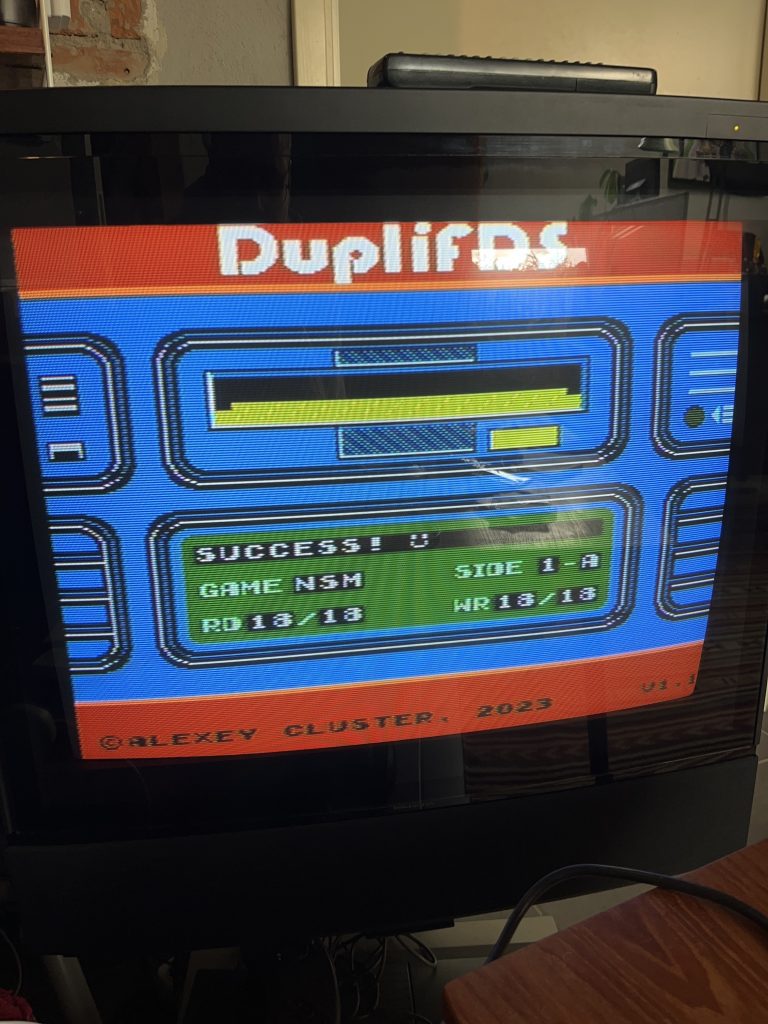
Now, we need a program to copy disks. I used the Open Source program duplifds that can be dowloaded for free here: https://github.com/ClusterM/duplifds
Put duplifds.fds anywhere on your SD-card, put the SD-card back in the FDS-Stick and power on your Famicom. Select duplifds.fds from the menu on the FDS-Stick and the program is loaded and will say eject or unmount disk, you do this by pressing left on the FDS-key. Now the screen will say Put in Source disk. That means that you should select and mount the game you want to copy from the SD-card. DupliFDS will automatically begin reading and putting the disk image into the RAM-memory of the Famicom, but since the RAM is too small for the whole disk to fit, you can’t copy the whole disk in one go.
Wait for the program to make a sound and say eject disk – then you put your physical disk in to your FDS Disk Drive, unplug the FDS-Stick, and put the cable from the RAM-cart in to your FDS Drive instead. The read portion of the disk will automatically get written to the disk, and DupliFDS will make a sound and say eject disk – When it does, you pull out the RAM-cart cable again and put it back in the FDS-Stick that will boot up and show the last selected game (but unmounted), so just push right to mount it. Also make sure you select the right side of the disk.
When it’s done, you switch back to real drive, and so on, until the disk is fully copied. Every disk that I’ve tried require either 2 or 3 changes per side. Takes about a minute per side to copy in total.
If you get an error message about bad block or CRC-mismatch, you can try to clean the disk and write again from the beginning of the side that had errors. It might work if you’re lucky but some disks are, unfortunately not rescuable.

You can also take backup of your game disks with DupliFDS, just plug in the real disk drive when DupliFDS asks for source, and select the fds-image you want to write the disk to on your FDS-Stick (does not have to be an empty disk, so you could just make a copy of any 2-side game and rename it).
Good luck with your new games!
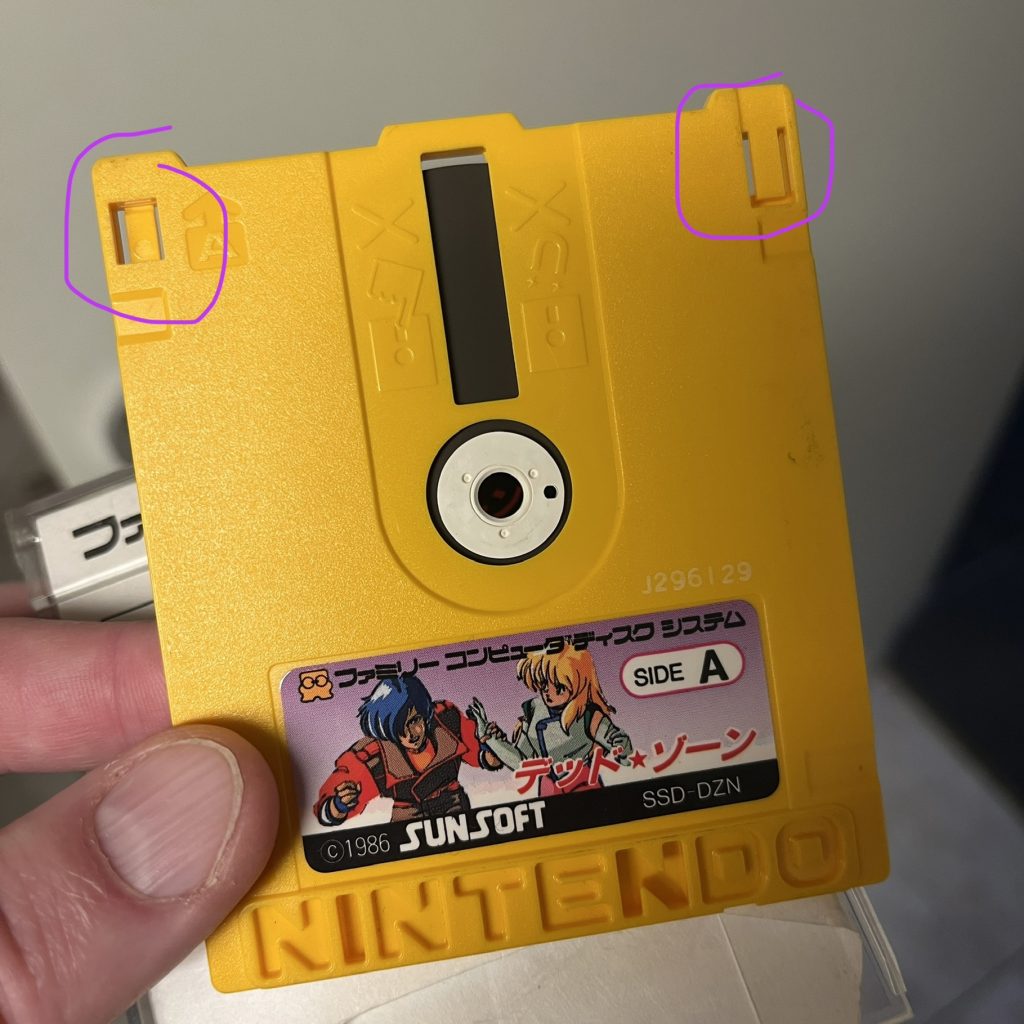
Extra info that I just found out but havn’t tested myself yet: There’s a physical write protection on the disks – if you break off the tabs in the corners of the disk, you can’t write to them. If your disks are missing the tabs you should simply be able put some tape over the holes to make them writable again.