Ever since I got my hands on a Vectrex with a multi-cart I’ve been wanting to find a way to produce my own overlays. This is still a work in progress for me but I’ve found some ways that works ok and that is cheaper than buying original or reproduction overlays on eBay.
I’m using a Canon MF8580 Color laser printer and will focus on printing with a similar laser-printer in this guide. The first thing to think about with laser printers is that it prints by heating up the material and applying toner to it. Obviously heat + plastic could end up as a disaster, so there are a few things to think about when choosing material.
I chose Overhead-paper (or OH-paper, as they are usually marketed as) that are specifically made for laser printers. You can probably buy it really cheap on AliExpress, but I chose to buy it from a more local and trusted vendor to make sure it wouldn’t melt in my printer. I found 25 sheets of clear plastic that works with laser for about $15 which seems like a good deal. A little downside is that is 100 micron thick, and that’s quite thin.
My solution to the plastic being thin was to get an A4 picture frame from IKEA for about $2 – nowadays they all have thin plastic in front of them instead of glass, so I just cut out an overlay from the clear plastic, and put it in front of my thin overlays printed on OH-paper. It holds the thin overlay in place and flattens it out.
You can download a cutting template here (if you don’t have a cutting machine, print it on regular paper, cut it out, then put it on the clear plastic and trace the outline)
Back to printing the overlays – first of all they need to be made/downloaded and then prepared for printing. I found this collection of overlays to be really awesome: https://github.com/raphkoster/vectrex-overlays
Those overlays were made for use in emulator, so they have various opacity on the parts that are see through on the real ones, but when we print them, they need to be not semitransparent, since printing on a OH-sheet will add that effect all over the overlay IRL. So if you want some of the overlay to not be transparent, you will need to add white paint on the back of those areas. More on that later.
My workflow goes like this: editing the overlays in Photoshop -> placing/sizing them in InDesign -> exporting to PDF and print -> print the white with Silhouette Studio -> cut out the overlay with Silhouette Studio. You can use different programs to edit/size/print and then add white and cut by hand if you don’t have these programs / tools.
So, open the overlay you want to print in Photoshop. In the top menu, press Layer, then Layer Mask, and select From transparency there. This will create a new layer that holds the contours of the stuff that should be transparent.
Hold Alt and click on the layer mask to edit it. Then press CMD/CTRL + i to invert the colors on the layer mask. Now use the magic wand-selection tool and select all the gray areas. Delete all the gray areas. Press CMD/CTRL + a to select everything in the layer. Copy it and paste it in to a new regular layer (not a layer mask). This will be the template for the stuff should be painted white.
Now delete the layer mask and you will be left with an overlay without transparency. Next step is depending if you want to add the white color to the same side as the print (faster and easier if you use a plotting machine, but kan scrape off some color if you are unlucky) or on the back side of the print. If you want to paint white on the same side as the print you need to go to Image -> Picture rotation -> Turn horizontally. This makes the print look the right way when you print it and flip it over. Export both layers as two separate files.
The next steps for me, involves InDesign, but you could do this in any program you like.
In InDesign – I’ve created a container that is 164mm x 209mm (the size of an overlay). Insert the exported overlay into that container and select Fill frame proportionally (it probably will be filled already, but do it anyways just to be safe). Then you can duplicate that layer and insert the other exported file in the frame. View one layer at a time, and export both as PDF:s (only the color-print is enough if you are going to add white manually)
Now, there is one very important thing to check before printing on a laser printer: Most printers have a settings-menu, either on the machine itself or via a web-interface. Before printing on OH-paper you should enter the settings and look for paper settings or tray settings – by default this setting would be set to regular paper, but regular paper may need some more heat for the print to stick, so see if you can change paper type to OH-paper, to make sure that the printer doesn’t heat up the plastic too much, so it melts.
After that is done. Print the PDF with the overlay! Make sure to select Actual size, and not shrink to paper in the printing options (otherwise it will shrink the size of the overlay to fit the margins of the paper).
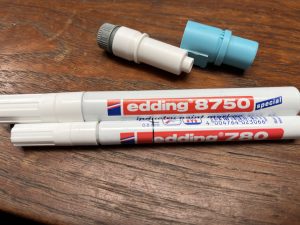
If everything was done correctly, you now have a nice looking, completely transparent overlay. To make some areas non-see-through, we need to paint the backside of them with white paint. Whatever paint you’ve got that sticks to plastic should work. I’m using an edding 8750 for manual fill and an edding 780 for my Silhouette Cameo 4 plotter.
Don’t forget to let the overlay dry after you paint it. After it’s painted, just cut it out and insert it behind your thicker clear plastic from the picture frame.
I’ve heard of some people that put the printed overlay in a lamination pouch and laminate it to make it thicker, but I havn’t tried that method myself yet (I don’t have a laminating machine).
I also skipped out on explaining how to automate the white painting process with Silhouette Cameo, since I assume not many people have this machine, but I might add a guide for that in the future if anybody want it. Let me know in the comments!
Good luck with your overlays!